Friday, August 31, 2012

A Great Weekend is Here!

This is going to be a great weekend, because Brian has Monday OFF for the holiday.....he will be home for an extra day!!!  I'm so happy about that -- now there won't be a sad post on Sunday night! :-D
We are not going anywhere or anything like that (NO money! :-P), but I love being home so I don't mind at all.  Besides, I can work on some projects!  That's pretty much my favorite thing to do anyway!! :-D

Today, we went to Lowe's and I got my wall paint -- I got a sample of the living room paint, to paint over the stenciling I didn't pick, and I got a quart for my kitchen, to paint the NEW wall I just plastered!!  OH JOY!!! :-D  I'm still not sure how I managed to run out of both my wall paints at the same time.....??

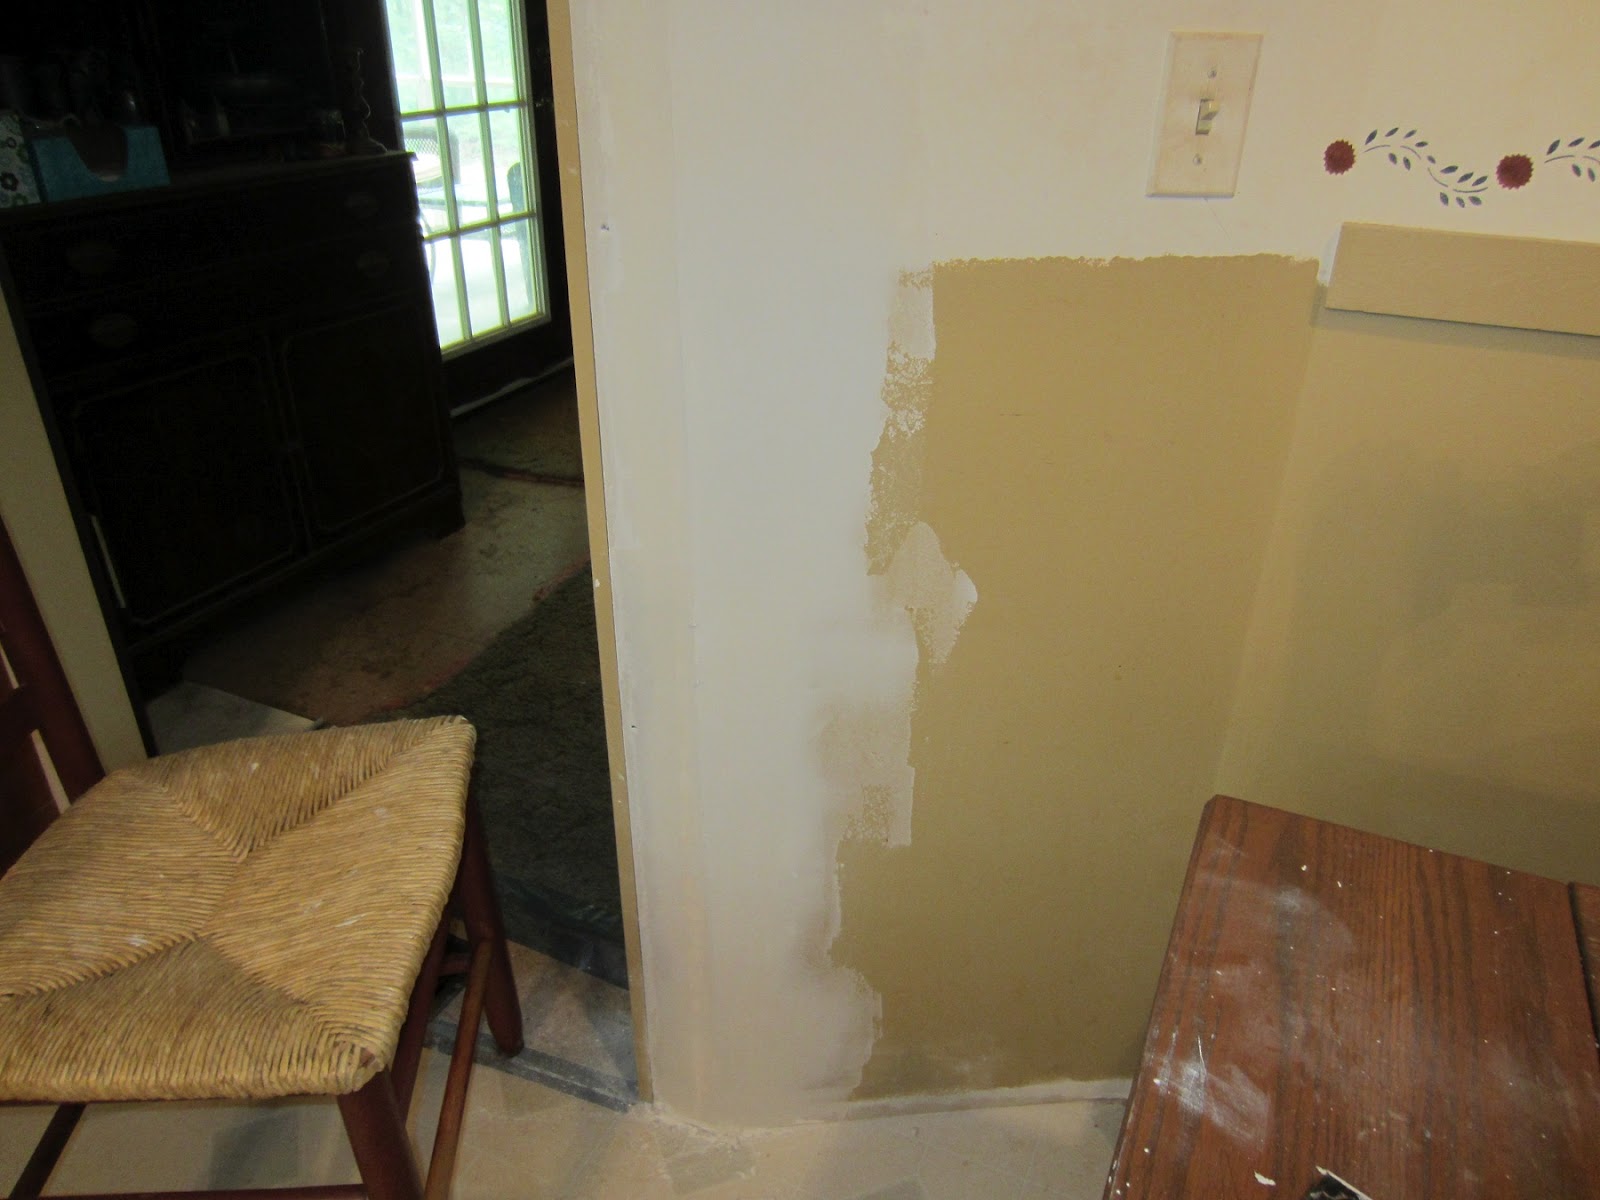
SO......Here's what I've been doing so far.....
 Since I had the plaster out, yesterday I patched that hole in the ceiling I showed a while back in a post....when you can't see it, that means it looks great!! :-D

This got done yesterday, too......
I picked every cherry tomato I could find in my garden!!  There are some more green tomatoes up there, so they aren't finished yet!  This might be enough to make a batch of tomato juice all by itself.....I'll clean them up and weigh them tomorrow.  The yellow ones are Sun Gold tomatoes and they are delicious ~ they will be yummy to drink!

Good-bye, unchosen stencil.....
It took three coats of paint to cover that stencil up!  It won't take long to get the right one up in this space!!

I tried sanding one motif, to see how it would look......
YUP!!!  That will be perfect under the antiquing glaze! :-D
I'm going to be trying a couple of color combinations with this stencil, to see if it would look better.....thank you, Marlene, for the idea!  It's a GREAT one!!! :-D

Picking up a few food items (ok, ice cream!) today in Walmart, THIS caught my attention and got my heart beating faster......
Look at all that inspiration!!!!  I don't care about Glidden paint, I just love paint colors! LOL  It is so hard to walk by this without grabbing some!  Ok, I confess....I grabbed five!! :-D

Now, should I make a list for the weekend?  I'm feeling an urge to make one right here, but I rarely do the things on my blog lists so I don't want to look like a fool to anyone reading this.....I guess I'll make a WISH list for this weekend ~ these are things I might do (so don't hold me to it! :-D):

       1. finish stenciling
       2. make tomato juice
       3. paint the new kitchen wall
       4. paint the cabinet by the couch (remember that?)
       5. touch up the mustard paint in the living room
       6. work on my cabinet boards!!! (sanding, cutting, putting together?)
       7. if I'm very adventurous (brave)....make a wallpaper box?????
       8. OR, if I'm very motivated.....clean my craft room!.....
.....it might need it, don't you think??? :-P  LOL
Well, there it is - my Maybe List!  Let's re-check it on Monday night and see how well I've done, shall we!?!

One more thought before I post this ~~ this is the LAST day of August....can you believe that?  I sure cannot!!  This month absolutely flew by for me, did it for anyone else??  WOW!  It isn't Fall to me yet, because I'm in the south, and it's still in the upper 80s every day (I'm not complaining), but it will be here fast and I'm just trying to enjoy the last bits of summer before it's gone until next year!  I can handle this kind of summer weather (just not 100s and 75 degree dew points!), so I am enjoying it.  I'm holding off on making pumpkin bread and Swedish apple pie until the time is right.....you can't rush these things!! :-D
Another Fall treat that I love to make is Yankee farm bread -- it's a small brown bread that is cooked in a loaf pan and doesn't rise.  I love serving it with cheese, it's SO satisfying!  I can't wait to share that on here, but it may be 2-3 weeks away!! ^-^

Wednesday, August 29, 2012

Oh GREAT.... :-P

Well, I stenciled the other wall in my living room, the wall over the TV....it didn't take too long, and it wasn't hard.  But something terrible happened when I got down off the ladder -- something that has happened way too often when I step back and view my hard work.......

I DIDN'T LIKE IT!!!! :-P  And I still DON'T like it! :-P

This happens to me all the time!  WHY??  What is wrong with me that I can't either pick the right thing to do, OR, be happy with what I've picked???  OH, it's SOOOO discouraging to feel like this!  This is part of the reason I have such a difficult time making decisions......I know I'm not going to like whatever I decide to do! :-P

Oh UGH!!!


Here are two pictures of the wall.....
I know that I haven't sanded the stencils yet, or glazed the walls, and the TV is hideous (I'm going to make a cabinet like Jo's, on her picture trail - see my sidebar - it's the BEST!).....so that might make a difference in how it looks to me, maybe.  But do you know how bad it feels to try so hard to pick something that I will like the look of, and then when I get it almost finished, I realize I DON'T like the look of it!?!  It's soooo discouraging.... :-(

Wait....oh even better.....I just noticed a mistake I made....! :-P
What a ditz I am -- LOOK.....
Notice anything missing....???
Perfect, Lisa!  Well, at least that's easy to fix, unlike when you wish you could paint over everything and pick something else....!
*SIGH!!*

I guess I'm going to keep it up, even though I don't like it, because maybe it will grow on me over the next few days once I get used to it.  Sometimes I dislike something new just because it's different and I'm not used to it, so there's some hope that I'll change my feelings about this.  Boy, I do hope so!  I HATE when this happens, I feel so discouraged!!  I could feel all my plans for painting and making stuff and creative inspiration screeching to a halt in my mind.  UGH!! :-P

Obviously, I didn't do anything else after this - I wasn't up for it!  But before I did the stenciling, I did the final sanding and smoothness check on my corner, and I'm happy to report it's perfect!! :-D (there's a smile!)
I didn't want to take another picture of the corner -- I'll wait until I get it painted and trimmed -- but I did take a picture of what happens when you are working on drywall and plastering and sanding!  My boys brought my attention to it, they thought it was so funny......

When I was sanding the new edge smooth, I stepped in the plaster dust and as I walked over our rug mat, I left my footprint! LOL  Part of the thing that my boys found so funny was how small my footprint is....I have very small feet (5 1/2), because I'm short (5ft), but both my boys are over 6ft tall and their foot size is 11 1/2 -12 -- good thing they didn't take after me, right?!! :-D

So I'll leave you with that image, since it's a little funny.....unlike the image of me staring at my stencil work and clenching my hair in both fists.....THAT'S not a happy image!! ^-^

Tuesday, August 28, 2012

Little Projects!!

Aaahhh!!  Don't you just love the projects you do that show how much something is coming together!?  It's the little things that mean the most, like wood puttying nail holes in trim, or changing knobs, or stenciling.....or plastering a corner!! LOL
It's almost finished!  Today I sanded the first coat of plaster I spread on yesterday.....
That's my special sheet rock sander, I love it!  It's designed flat so that it can keep the plaster flat against the wall, and I love the handle! :-D   Sanding plaster sure makes a MESS, though.....
After sanding off and evening out the rough spots over the tape, I put on another coat of plaster, this time using the longer knife and keeping it thin and feathering it out further....that's how it blends into the wall that's already there.  See, MUCH better......

There is my near-perfect NEW corner!! :-D  It's still a little rough at the point, but that will be sanded smooth tomorrow!  Then I'll paint it, continue the chair rail trim, and stencil over it - voila!!!
I am SO happy with it! :-D

The other thing I did today (finally!) was to stain the library room curtain with coffee!  Hey, another small job, right?!! :-D
I used instant coffee I bought specifically for this (I don't drink coffee).....
Here it is, waiting....see how light it looks?......
I heated a pot of water, and added 3 tablespoons of the coffee.....
Nice color!  I pressed the fabric into it and soaked it for 30 minutes (with the stove off, of course!).....
It looks funny to have fabric in a cooking pot on my stove! :-D
I drained it, rinsed it and dried it!  Then it was ready to hang back up.....
MUCH better!!  I wanted it a little darker, but that will do!  I can't wait to stain and stitch on the rest of this fabric - it's so nice!  (see how I'm planning future projects, while I haven't even finished current projects???  Hopeless! LOL)

I am thinking of papering one of my wood boxes tomorrow....this is as close as I got to it today.....
I'm hesitating because I'm not sure how I'm going to do this!!! LOL  It can't be that hard to figure out.....can it??  Maybe tomorrow..... ^-^

Monday, August 27, 2012

Plastering the Wall!

Well, I did the first layer of plaster on that kitchen corner - did I mention how much I love getting these little jobs finished??  Once this is done, I'll never have to think of it again!

So I know that no one will find this that interesting - it's not painting or creating anything, but I am going to show how I do this anyway, even just for myself to look back on! :-D
Here are the needed tools.....
I won't be using the yellow tape, because it's sticky and netted....a corner like this will do better with a solid paper tape (so I won't get any cracks in the seam later).  And I LOVE plaster knives, the smaller one has a taped handle because I don't want to replace it, it's my favorite!  See, I hoard plaster knives too!! LOL
This ginormous container of plaster is easy to lift onto the table because it's almost empty.....
Yup, I've used almost all of it around here, all 4.5 gallons of it!  We've rebuilt a few walls! :-D  The plastic over it keeps it from drying out, and it works because I bought this many years ago, maybe even five years ago, and it's still perfect and ready to use!  The other great thing about it is that this whole container full only cost about $10-12.....it's a very economical project material!
Alright, let's go!!
Here's what I'm starting with.....

So I start by folding the paper tape.....
.....this will help make a sharper corner....
Then I scoop out the plaster I'll need and cover the large container, and start spreading it on with my plaster knife.....

.....I start from the top and spread it on each side of the corner.....I have to work fast, because thin spots can dry really quickly!
Once I have enough plaster on there, I press the paper tape into the wet plaster with my plaster knife, being careful to keep the fold straight over the corner.....
Then, I go back over the tape with more plaster, one side at a time, so I can keep the corner fold straight.....
That looks better than the other picture, doesn't it?  Ok, layer one, complete!! :-D
Now I'll leave this to dry overnight, then I'll go back tomorrow and spread another layer on top of it!

Wasn't that neat?!! :-D

After I got that done, I finished the stenciling in the library room.....

It's so pretty!!  I still have to go back and sand them, but that's easy....then I'm thinking about using the antiquing glaze on these walls too....OH!!  I'm SO unsure about that!  I don't have alot of confidence with things I'm not familiar with....that's why I hesitate!  I just have to keep working up the nerve - it might take me a little bit, but I'll do it! :-D

Tomorrow, I want to stencil some more in the living room.....although I've hit a bit of a snag - I don't have anymore of the wall paint for it, which means I can't paint over the first stencil I painted on that one wall!  OOPS!!  Haha!  Well, I guess I can't finish until this weekend, then....that's ok, I've got plenty of other projects to occupy me until then! ^-^

Sunday, August 26, 2012

Another Choice.....UGH!!

Ok, I stenciled another wall in the living room, with the new stencil I showed last night.....I'm almost sold completely on it, but there are still a few doubts creeping in....what do you think?......
I used a greenish-blue paint for it, and I'm not sure about that, either!
I'm pretty sure I like this one better than the other one I painted, but I found a scroll-y one that I like alot, too!  OH!!  So many stencils, so little rooms! :-D
I posted the stencil pictures on the A Primitive Place forum, maybe those ladies can help me....haha!

Once I get the stenciling done in here (if ever), I'm going to try that antiquing glaze.....!  I'm nervous about it, but I'm going to just DO IT, on one wall to test it out -- if I hate it or mess it up, I'll just paint over it and forget all about antiquing glaze! LOL  But hopefully it won't come to that!

The other big deal about today is that Brian finally put up the last, smallest piece of sheet rock in the kitchen -- I've been wanting that finished for a few years, so YAY!! :-D
When we first put the new walls in the kitchen, we had a strange angle for the wall that entered the family room, and he cut the piece wrong, so the wall edge was completely off, and I couldn't plaster and tape it and finish it!  It was another little problem that kept getting put off, because there were other more important things to do.  But finally, several weeks ago, I took the piece OFF the studs and started threatening him that I was going to do it myself!! LOL (that always works! :-D) 
Here are some pictures of what I'm talking about......
Here it is BEFORE - see how the angle above the door frame is in one spot, and the way he cut and hung the last piece of rock puts the angle further out.  There was no way to fix this!  It HAD to be redone!!
Here is when I took it off......
The sheet rock above it was hung first, about a year before he (finally) put up the last piece, next to the frame.  When I tried to plaster and tape it, I realized that he had hung it just a little off from where it was supposed to be, and I couldn't do anything to fix it, it had to be redone!
Today, he did it!  Aaaahhhhh!!!!  MUCH better!......
Now I can finish it!! :-D  That makes me SO happy - all these little jobs are getting done!
It won't take much for me to plaster and tape this corner -- I plastered ALL the seams in all the walls in the kitchen!  That outside corner above the frame is MY work!! :-D  

So, I'm still having no luck at all with instructions for wallpaper boxes.....I guess I'm really on my own with it! :-P  I'm going to finish the kitchen wall tomorrow, and then I'm going to start on the boxes, if there's enough time.....I'll just have to try some ideas of my own to make it look the way I want.  I'll be sure to take pictures and write down the steps -- hopefully, they will turn out right!

Now for the BAD news.....it's Sunday night! :-(  I hate when Brian goes back to work, I always wish he could be home (to work on more of my projects! hee hee!!)  The silver lining is that I get really motivated when he is gone, to work on things so he can be surprised or relieved about them when he gets home.  So let's see how I do tomorrow, right?!! ^-^

Saturday, August 25, 2012

A Nothing Day.....

Well, I didn't do much of anything in the way of projects today....I looked at them all, but I just kept looking! :-P   I did freeze some more tomatoes from my garden (which are REALLY slowing down), and I think I want a different stencil in my living room, not the tulip-looking one a few posts ago.  I'm thinking of this one that I wallpapered over, way at the beginning of my blog.....
Remember this old picture??? :-D  I'm thinking that might be the stencil I'd like best in here.....I'm going to stencil it on one wall, and see how it looks!  Of course, that means picking a color....ugh!

I also spent some time trying to find instructions online for making and distressing the wood boxes in my last post.....I found some wonderful pictures of what other people have done, but no instructions!!  I'm kind of afraid to start them without knowing what I'm going to do....I'm going to look some more online and in my different magazines and books -- sometimes they give techniques for primitive crafts. 

I wanted to take some pictures of where we live, here in the country.....we live at the end of a dead-end dirt road, more than a half-mile from the main road.....it's my dream come true!!!
I love it back here, we have 3 acres of land, and all the land around us is woods, too!  PARADISE!

So here we go.....our house is on top of a hill, and I walked a little ways down that hill to take this picture....
....this is the way back to the main road - our land is on the right.
Now I turned around and headed back to our house......
.....see I'm heading back up to the top of the hill - our land is on the left in both of these pictures.
Here's our driveway, on the left.....
I love that fence!  I wish we had it on both sides of the driveway, and along the road, too!  Someday!! :-D
Here the road goes a little further on to the last property at the end.....
.....she's a wonderful lady, and she doesn't live there yet, either.
Here's down our driveway......
.....see our car?  I was going to take one of our house back there, but my camera battery died!! :-P
That's ok, I think you get the idea! 
See why I love my little home in the woods? :-)  I know this would drive some people crazy (my sister Karen, as a matter of fact), but it is just the kind of place I am truly happy!  Walking along the road, taking those pictures, all I heard was the wind and the birds -- peace and serenity!!! ^-^

Friday, August 24, 2012

FUN things!!!

I got a brilliant idea today!!
I still have that wooden box I bought from Goodwill a couple of weeks ago, and I've been wanting to cover it with wallpaper and "age" it, but I haven't been able to find the right wallpaper pattern that I want to use.....I WAS thinking of stopping at a few wallpaper stores, to grab some discontinued books (they are always happy to give those away!  Just FYI!), but I thought I could look for something at Hobby Lobby in the scrapbook section first......
LOOK at all those papers to choose from!!! :-D

I found three patterns that I think would look perfect.....
 ....here's a closer picture......
And here are some I bought for inside the box.....
Some antique boxes I've seen had old newsprint or sheet music in them!  So I picked papers that looked as much like that as possible.....check out the paper on the bottom right, it is SO neat!.....
.....can you see what that print is?  It's writing on burlap!  I loved it - you can't get anymore primitive than that! :-D  I've GOT to use it on something!!

So I went into my craft room, because I wanted to find the box I was going to use (from the thrift store), and while in there, I found MORE boxes that I forgot were in there.....
Lookie, lookie!!  The biggest box is the one I found at the thrift store, too, but the other two unfinished wood boxes we bought a few years ago for the kids, and when they got older (and bored of them) they gave me back those boxes.  I think I even pulled one of them out of the trash on a cleaning day....you don't throw those kinds of things away, unless they are broken!  Sheesh!!
So, I'm going to be able to have some "old" painted and wallpapered boxes stacked up, just like I love in all those gorgeous colonial homes I drool over!  What fun!! :-D

And, while walking around Hobby Lobby, I saw this......
WOW!!!  I so much want to buy this!  All I can think of is how great that would look this fall in my front yard!!!!  But, sadly, it is too much money for me to spend....it's $97.... :-(  Boohoo!!  You can see it's good-sized, and I'm not thinking the price is unfair, I just do NOT have that kind of money to buy anything (except maybe half of the electric bill :-P)  Maybe it won't sell, and I can grab it in a few months, if our finances loosen up....that's what I'm hoping....in the meantime, I just keep staring at that picture.....*SIGH!*

Now for one final thing.....tell me if this makes any sense at all -- I am an avid stenciler, I love to stencil, and I've been doing it for a long time.  I always use the bristle stencil brushes.  Recently, I read a comment from someone online who stencils, and she said the little sticks with foam on the end were her favorite thing to use for stenciling, and I was so curious to try them!  I figured, they had to be cheaper than brushes, since they are just sticks and foam.....I was wrong.....
This is at Walmart, mind you -- can you believe that??  That is total price gouging, because there is NO reason for them to cost that much!  It probably cost them 20 cents to make them!!  Look at these.....
.....they are bigger, with more material used to make them, and they cost a fraction of what the stencil foams cost!  I couldn't believe it!! :-P  There's NO WAY I am going to pay that for sticks and foam.  I'm just going to have to make my own!  I have a huge bag of these foam brushes in the bottom picture, I got them from a discount store for one dollar (for about 12 of them, all different sizes).....I guess I'll just cut off the pointy tip and try using it like that. 

I'm pretty excited about the papers!  I can't wait to get started on the boxes - I'm going to have to find that tutorial on them....I know how to cover them with the paper, but I'm not sure how to distress them so that they look really old.  I'll be sure to take pictures when I get going on it!! ^-^