Today was the Apple Festival!!!!
It was a beautiful day! We got there at 10:30, and it was in the 70s with a little breeze -- just perfect for walking around!! It was HUGE......
Look down at the end of this road.....that's the historic court house, and all the apple orchards were set up down the street behind it! Oh what FUN, though!! :-D
I loved all the vendors, I could have photographed the whole time I was there! There were all kinds of artisans and other businesses with tents and tables set up - the police had a table, the National Guard, a few banks and churches - and SOOOOO many things to buy......
Those are crocheted pumpkins!! They look so cute all piled up on the table!
I love all this handmade pottery!!!!
This woman is selling her handmade soap.....for $6 and inch!! She had a cheese board and cheese knife to cut it with! I don't know if you can enlarge the picture to see it better, but the soaps are all different colors, and they smelled wonderful! ....hmmm....maybe I should try making my own soap sometime..... (haha!)
Look at these....they are GOURDS! They are all polished and painted, some have twine or jute wrapped around them! It looks like the sunlight made the picture a little foggy, but maybe you can see better if you click on it...? I got some great ideas looking at these! :-D
Here are more pumpkins! These I like so much better because they are made with fabric and burlap....I don't think they would be very hard to make, either! I love the twine used to make the pumpkin veins - it looks perfect!!
Besides the pottery, these were my favorite things I saw today.....they are little faces carved in wood branch-pieces! Look at them!.....
I love how each piece has it's own little personality! The man who carved them looks like he's in his 70s, and was sitting there carving a walking stick while people came in and out of his tent! He must be so creative to be able to carve all these little tree people, with all different faces!! I grabbed his card (and the one from the pottery lady!) so I can look online at more of his stuff!
And finally, the star of the show, the reason that I was there (besides the fried dough and fried apple pies - YUM!!)......
I bought the Asian pears here (they are on the right), and I bought Winesap apples at another stand, they are the BEST cooking apples! I would have taken another picture, but by this time, my kids were saying, "another one, Mom??".....so I figured maybe I had enough!! LOL
Here's my STASH.......
Oh the plans I have for these!!! :-D (don't mind the dirty floor....)
So, it was a wonderful day! I wish I had more money for some things I really liked, but that's ok.....I got what I wanted most!! :-D Maybe I should start tabbing all my recipes! LOL
Tomorrow will be a nice relaxing day -- food shopping and then home with Brian! We got the wood and paint yesterday, but I'm not sure if he will feel like putting the rest of my cabinet together yet....although, I haven't sanded or stained the new boards either, so there might not be time for him to put it together! We'll see!!
Time for bed, I guess (it's 1am here).....I'll be dreaming of apples and pears! ^-^
Saturday, September 15, 2012
Thursday, September 13, 2012
Anyone for MORE COOKIES...??? :-D
Oh I am loving these Fall temperatures!!! It's been in the upper 70s all week, and I feel SO happy with the windows open! :-D Growing up in Massachusetts, I never had air conditioning, except one summer when I was pregnant with my daughter my mom gave us an old window unit for our bedroom so I could sleep (the only times I've ever been HOT all the time was when I was pregnant!). But other than that, I just had fans to run, and then we just waited.....it never stayed hot for long, and I have always had more tolerance for the heat than the cold!
Flash forward to moving down here, and almost everyone has central air conditioning! (It's all electric, and it still has never cost as much as my oil-heat bills would cost in New England winters!!) So now, I have to seal my house up tight every summer, and I start to feel choked up on the "fake" air -- when I am finally able to keep my windows open and get real air in the house, I LOVE it! It rejuvenates me!! :-D
I guess that's a super-long story to explain why I'm so happy about sitting next to my open window every night! LOL
First, I want to show you how I finished sanding the stencils, because I figured out what I didn't like about them....they were too uniformly sanded -- it didn't look like "wear", you know what I mean? So when I sanded the rest of them I tried to keep it uneven looking, like this......
See how I sanded more on the edges of some motifs? I think that looks better than all-over sanding, don't you? I'm done sanding all of them now, so I have no more excuses about waiting to do the antiquing glaze....!!! Oh, I'm so unsure of how to do it! I'm going to have to do it on Monday, so I'll be home and can focus fully on how to get started on it!
That reminds me.....it's THURSDAY today! My favorite day of the week!! :-D You know what that means -- tomorrow I'm getting my wood (yay!), and I'm also getting black paint for my island (yay again!), AND, the Apple Festival is the day after tomorrow (double-YAY!!!)! I intend to have several exciting things happening this weekend, it's going to be GREAT!! :-D
So here is a current picture of my kitchen island, with a little more Lincoln Cottage Black painted on.....
That is the perfect black for it, I think! Grace asked me a few days ago if I was going to paint the knobs black, and I am, and I want to distress them as well, just like in the picture - I think their knobs are tarnished metal (maybe bronze or brass), they don't spare any expense with their cabinets (*sigh!*), but mine are wood so they will be easy to paint and sand to perfection! (LOL - well, it's never quite perfection!)
I stopped painting it because I'm going to buy a quart of this color instead of using the sample -- first, this island is pretty big (you'll see when I post a picture of it all painted) so it would take many samples to get two coats of paint on it! And second, the sample paints are all Satin finish, and the shiniest finish I can stand is eggshell! I won't get flat paint for this, though, because it needs to be somewhat wipeable....it's had a few spills on it!! :-D
I feel so good when I get these decisions made! LOL It's a struggle for me!!
Something else I got to in the past two days was my craft room.....
That's a little better!!! :-D I know there are still piles of stuff all around, but at least I can walk in here now and I got my fabric and yarn stored in their areas. I definitely need to work on that table on the left (yes, there's a table under there!) -- that's where I piled alot of my primitive supplies and I want to see what I have under there! You'll remember how easy it is for me to forget what I own, well, this is why....my stuff stays in piles way too long!! LOL Now at least I have the floor space to take that stuff off the table and put it away....one of these days...! Haha!!
Today, I repainted the living room cabinet that I painted blue the other day.....
Better?? I'm not sure, but I changed my mind about the blue because I already painted a cabinet that same color here, and I didn't want to have two......
We made this cabinet a few years ago, for my stereo (that we still barely play!) -- this is an older picture (see the ugly wall on the left?...that's where I wallpapered!).....it was my first attempt to "distress" something, and I think I should have used a little bit more paint! Oh well, I'm just leaving it! But you see it's already that same blue, so I changed the other one. I still have to sand off the edges and dry-brush some brown or black paint over it. Then we'll see if it looks right!
I've been having some fun these past two days, right?! :-D I didn't post last night because I was so tired and I fell asleep on the couch! LOL
But I DO have one more thing to share with you that I did today......MORE COOKIES!!!
These are VERY good, and I have a hard time not slivering off bite after bite out of the pan!! These are called Chocolate Scotcheroos, or I call them peanut butter crispy treats!
They are so easy to make and take only a few ingredients....
Combine 1 cup of sugar and 1 cup of light corn syrup, bring it to a boil over medium heat.
Boil it for only a bit (1 minute), then remove it from the heat and add 1 cup of peanut butter.....
(....and give puppy the empty peanut butter container....)(she's SO cute!!)....
Stir it until the peanut butter is all mixed in and creamy.....
Then add 6 cups of rice crispies.....
And stir those around until they are all coated with the peanut butter sauce.
Then spoon them into a greased (sprayed) 9x13 pan.....
(Oh my goodness, I wanted to start eating this right here!)
Press them flat into the pan, and then start making the topping......
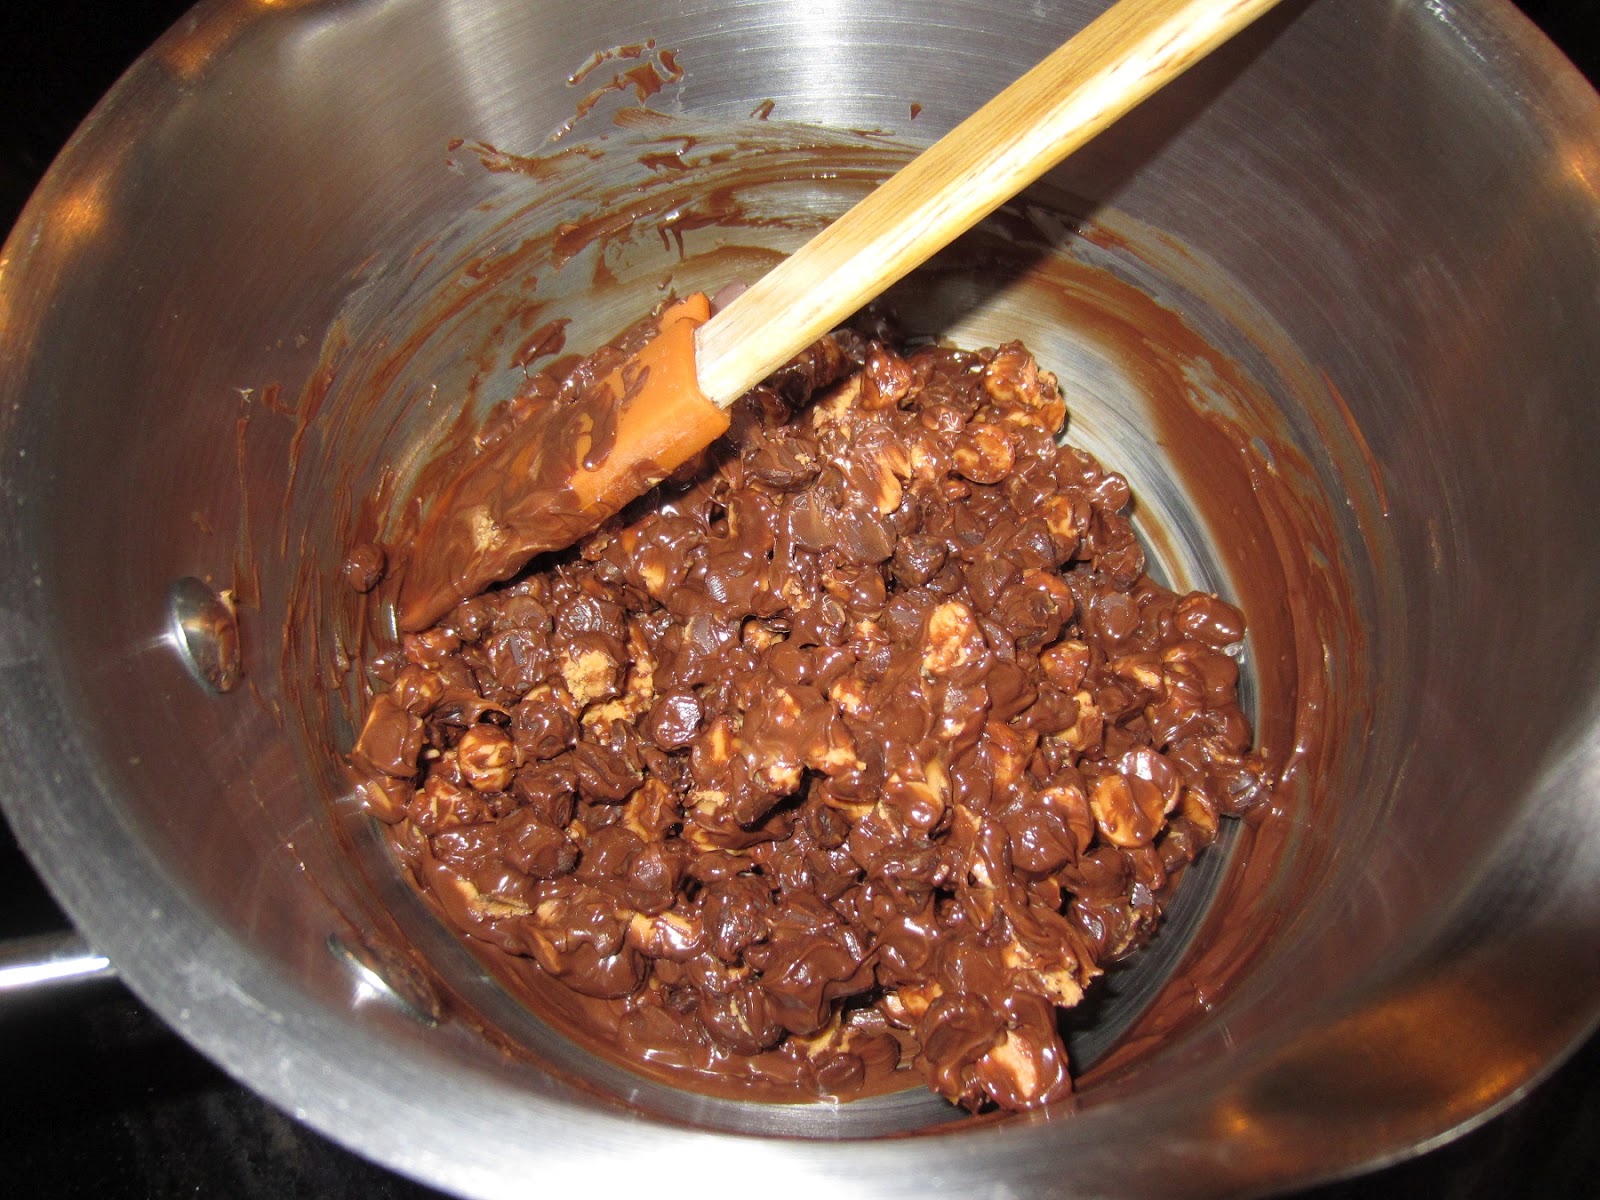
Melt 1 cup of butterscotch chips and 1 cup of semi-sweet (or milk chocolate) chips together - I always add a little extra of the chocolate chips, like maybe 1/8 cup extra. And you can use a microwave if you like melting them that way.
Stir them over medium-low heat until they are creamy and combined.....
Oh YUM!!!!
Just so you know, the butterscotch chips don't melt as easily and smoothly as the chocolate, so I use whatever I am stirring with to mush them into the melted chocolate.....DON'T keep the heat up high thinking that will work - that will only make the chocolate crumbly and dry (I speak from, ahem, experience!).....
Perfect!! Spread it over the rice crispies.....
And now all that's left is to try NOT to eat 1/3 of the pan!!! :-D
These are SO delicious.....let me show you that picture of them cut again.....
WOW!! I am resisting the urge to get up and eat more right now!!! LOL You know these will be gone tomorrow too! :-D
That's what I've been doing around here the past two days! I am going to have some fun things to post about tomorrow I bet, and then the next day is the Apple Festival!! Then next week my posts will be about making apple sauce, and apple juice, and pear honey, and cranberry-pear relish, and Swedish apple pie, and......!! ^-^
Flash forward to moving down here, and almost everyone has central air conditioning! (It's all electric, and it still has never cost as much as my oil-heat bills would cost in New England winters!!) So now, I have to seal my house up tight every summer, and I start to feel choked up on the "fake" air -- when I am finally able to keep my windows open and get real air in the house, I LOVE it! It rejuvenates me!! :-D
I guess that's a super-long story to explain why I'm so happy about sitting next to my open window every night! LOL
First, I want to show you how I finished sanding the stencils, because I figured out what I didn't like about them....they were too uniformly sanded -- it didn't look like "wear", you know what I mean? So when I sanded the rest of them I tried to keep it uneven looking, like this......
See how I sanded more on the edges of some motifs? I think that looks better than all-over sanding, don't you? I'm done sanding all of them now, so I have no more excuses about waiting to do the antiquing glaze....!!! Oh, I'm so unsure of how to do it! I'm going to have to do it on Monday, so I'll be home and can focus fully on how to get started on it!
That reminds me.....it's THURSDAY today! My favorite day of the week!! :-D You know what that means -- tomorrow I'm getting my wood (yay!), and I'm also getting black paint for my island (yay again!), AND, the Apple Festival is the day after tomorrow (double-YAY!!!)! I intend to have several exciting things happening this weekend, it's going to be GREAT!! :-D
So here is a current picture of my kitchen island, with a little more Lincoln Cottage Black painted on.....
That is the perfect black for it, I think! Grace asked me a few days ago if I was going to paint the knobs black, and I am, and I want to distress them as well, just like in the picture - I think their knobs are tarnished metal (maybe bronze or brass), they don't spare any expense with their cabinets (*sigh!*), but mine are wood so they will be easy to paint and sand to perfection! (LOL - well, it's never quite perfection!)
I stopped painting it because I'm going to buy a quart of this color instead of using the sample -- first, this island is pretty big (you'll see when I post a picture of it all painted) so it would take many samples to get two coats of paint on it! And second, the sample paints are all Satin finish, and the shiniest finish I can stand is eggshell! I won't get flat paint for this, though, because it needs to be somewhat wipeable....it's had a few spills on it!! :-D
I feel so good when I get these decisions made! LOL It's a struggle for me!!
Something else I got to in the past two days was my craft room.....
That's a little better!!! :-D I know there are still piles of stuff all around, but at least I can walk in here now and I got my fabric and yarn stored in their areas. I definitely need to work on that table on the left (yes, there's a table under there!) -- that's where I piled alot of my primitive supplies and I want to see what I have under there! You'll remember how easy it is for me to forget what I own, well, this is why....my stuff stays in piles way too long!! LOL Now at least I have the floor space to take that stuff off the table and put it away....one of these days...! Haha!!
Today, I repainted the living room cabinet that I painted blue the other day.....
Better?? I'm not sure, but I changed my mind about the blue because I already painted a cabinet that same color here, and I didn't want to have two......
We made this cabinet a few years ago, for my stereo (that we still barely play!) -- this is an older picture (see the ugly wall on the left?...that's where I wallpapered!).....it was my first attempt to "distress" something, and I think I should have used a little bit more paint! Oh well, I'm just leaving it! But you see it's already that same blue, so I changed the other one. I still have to sand off the edges and dry-brush some brown or black paint over it. Then we'll see if it looks right!
I've been having some fun these past two days, right?! :-D I didn't post last night because I was so tired and I fell asleep on the couch! LOL
But I DO have one more thing to share with you that I did today......MORE COOKIES!!!
These are VERY good, and I have a hard time not slivering off bite after bite out of the pan!! These are called Chocolate Scotcheroos, or I call them peanut butter crispy treats!
They are so easy to make and take only a few ingredients....
Combine 1 cup of sugar and 1 cup of light corn syrup, bring it to a boil over medium heat.
Boil it for only a bit (1 minute), then remove it from the heat and add 1 cup of peanut butter.....
(....and give puppy the empty peanut butter container....)(she's SO cute!!)....
Stir it until the peanut butter is all mixed in and creamy.....
Then add 6 cups of rice crispies.....
And stir those around until they are all coated with the peanut butter sauce.
Then spoon them into a greased (sprayed) 9x13 pan.....
(Oh my goodness, I wanted to start eating this right here!)
Press them flat into the pan, and then start making the topping......
Melt 1 cup of butterscotch chips and 1 cup of semi-sweet (or milk chocolate) chips together - I always add a little extra of the chocolate chips, like maybe 1/8 cup extra. And you can use a microwave if you like melting them that way.
Stir them over medium-low heat until they are creamy and combined.....
Oh YUM!!!!
Just so you know, the butterscotch chips don't melt as easily and smoothly as the chocolate, so I use whatever I am stirring with to mush them into the melted chocolate.....DON'T keep the heat up high thinking that will work - that will only make the chocolate crumbly and dry (I speak from, ahem, experience!).....
Perfect!! Spread it over the rice crispies.....
And now all that's left is to try NOT to eat 1/3 of the pan!!! :-D
These are SO delicious.....let me show you that picture of them cut again.....
WOW!! I am resisting the urge to get up and eat more right now!!! LOL You know these will be gone tomorrow too! :-D
That's what I've been doing around here the past two days! I am going to have some fun things to post about tomorrow I bet, and then the next day is the Apple Festival!! Then next week my posts will be about making apple sauce, and apple juice, and pear honey, and cranberry-pear relish, and Swedish apple pie, and......!! ^-^
Tuesday, September 11, 2012
COOKIES!!! :-D
I made something YUMMY today.....they are my Aunt Rose's Oatmeal Bars!! They are special because they have chocolate chips and chocolate frosting! I just HAD to share them with you.....
I don't know why they taste so good.....they are, after all, only chocolate chip oatmeal cookies (which taste great already!).....but there is something about the frosting on them that changes the taste into something even better!
I decided to make cookies because look what I got this past weekend.....
These were on sale at my super Walmart -- I don't know if they had extra or what, but they were all $1.70 each!! I grabbed what was left!! LOL I bet these will last me through my Christmas cookie baking, too!
So, the recipe.....
This recipe is from the 1960's -- my father's sister Rose gave it to my mom when she was first married to my dad! There's a reason it's lasted this long!! :-D (although their marriage only lasted 2 years! LOL)
Start with softened butter, sugar, vanilla, and 1 tablespoon of hot water (I don't know why, but I just do it!).....
Mix it all up, then add eggs and mix it again.....
Then combine flour, baking soda, salt, and oatmeal.....
Add it in and mix it up.....
Then, my favorite part......
I always have to throw 4 or 5 in my mouth!! :-D The recipe says to add 1/2 cup, but I always add a full cup - you have to! You can add nuts too, if you like them.
Mix in the chocolate chips and then spread the batter in a greased (I use spray) 9x13 pan.....
And bake it at 350 for 25-30 minutes (I bake it for 25 minutes in my oven).
When it's done, cool it for an hour or so, then MAKE the FROSTING!!!! Yay!
Melt butter.....
Stir in vanilla....
....and cocoa.....
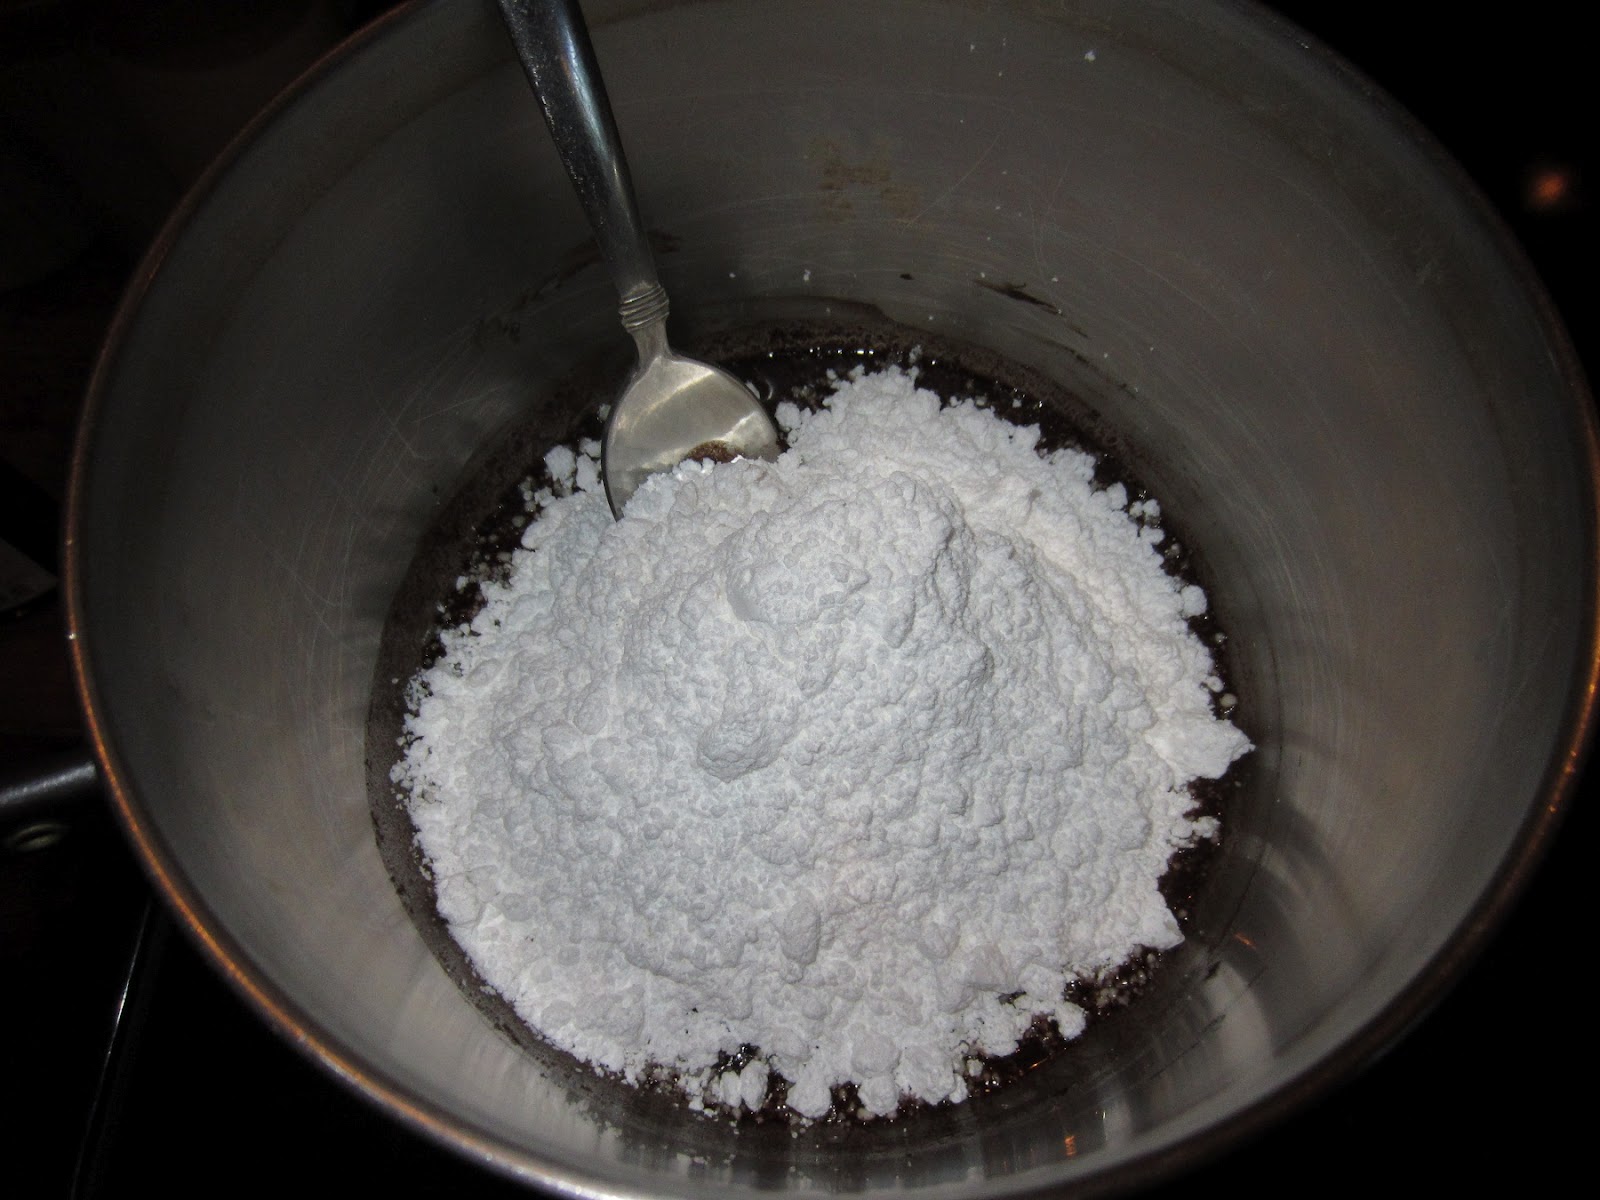
Then add powdered sugar and a little milk.....
.....and stir and stir and stir until it's all smooth and chocolatey!!.....
Spread it on, and it's ready to EAT!! Yum Yum!.....
When I was a girl, my mom would cut them into small 2inch x 2inch squares, but I can't do that with these gluttons -- this will be GONE tomorrow! I mean, just look at the size of the squares in the beginning of this post!! LOL That's ok, I love baking goodies for my family! :-D
I'll type out the recipe below, since I didn't give the specifics with the pictures.....
1 c. butter
2/3 c. white sugar
2/3 c. brown sugar (I just use white again and add 2 T. of molasses)
1 T. hot water
1t. vanilla
2 eggs
1 1/2 c. flour
1t. baking soda
1/2t. salt
2 c. oatmeal
1/2 c. chocolate chips (I always use 1 c.)
1/2 c. nuts (if you want them)
Bake at 350 for 25-30 minutes
Frosting:
3 T. butter
1t. vanilla
2 T. cocoa
1 1/2 c. confectioners sugar
2 T. milk
Follow the directions with my pictures, and ENJOY!!!!^-^
I don't know why they taste so good.....they are, after all, only chocolate chip oatmeal cookies (which taste great already!).....but there is something about the frosting on them that changes the taste into something even better!
I decided to make cookies because look what I got this past weekend.....
These were on sale at my super Walmart -- I don't know if they had extra or what, but they were all $1.70 each!! I grabbed what was left!! LOL I bet these will last me through my Christmas cookie baking, too!
So, the recipe.....
This recipe is from the 1960's -- my father's sister Rose gave it to my mom when she was first married to my dad! There's a reason it's lasted this long!! :-D (although their marriage only lasted 2 years! LOL)
Start with softened butter, sugar, vanilla, and 1 tablespoon of hot water (I don't know why, but I just do it!).....
Mix it all up, then add eggs and mix it again.....
Then combine flour, baking soda, salt, and oatmeal.....
Add it in and mix it up.....
Then, my favorite part......
I always have to throw 4 or 5 in my mouth!! :-D The recipe says to add 1/2 cup, but I always add a full cup - you have to! You can add nuts too, if you like them.
Mix in the chocolate chips and then spread the batter in a greased (I use spray) 9x13 pan.....
And bake it at 350 for 25-30 minutes (I bake it for 25 minutes in my oven).
When it's done, cool it for an hour or so, then MAKE the FROSTING!!!! Yay!
Melt butter.....
Stir in vanilla....
....and cocoa.....
Then add powdered sugar and a little milk.....
.....and stir and stir and stir until it's all smooth and chocolatey!!.....
Spread it on, and it's ready to EAT!! Yum Yum!.....
When I was a girl, my mom would cut them into small 2inch x 2inch squares, but I can't do that with these gluttons -- this will be GONE tomorrow! I mean, just look at the size of the squares in the beginning of this post!! LOL That's ok, I love baking goodies for my family! :-D
I'll type out the recipe below, since I didn't give the specifics with the pictures.....
1 c. butter
2/3 c. white sugar
2/3 c. brown sugar (I just use white again and add 2 T. of molasses)
1 T. hot water
1t. vanilla
2 eggs
1 1/2 c. flour
1t. baking soda
1/2t. salt
2 c. oatmeal
1/2 c. chocolate chips (I always use 1 c.)
1/2 c. nuts (if you want them)
Bake at 350 for 25-30 minutes
Frosting:
3 T. butter
1t. vanilla
2 T. cocoa
1 1/2 c. confectioners sugar
2 T. milk
Follow the directions with my pictures, and ENJOY!!!!^-^
Monday, September 10, 2012
In the Meantime.....
While I wait for the wood to finish my cabinet, I have several other projects I want to work on (of course!).....one of them is painting my kitchen island (remember that one? :-D)
When we built it, I wanted a different color in there, and I picked green.....
I've never been completely happy with this color....I color-matched it with a green from one of my Olde Century Paint color charts, but I still have never felt like it fit the piece, or the kitchen.
So when I saw this on Pinterest.....
I knew I wanted that color!! This is a piece by David Smith, I think, so I know I have the right taste! Haha!
Anyway, it's been all down hill from there! I have purchased THREE different shades of black (samples, at least), and used others I already had, and I haven't been close! :-P.......
YIKES!! No way!!
NOPE!!
Tried this color on the right corner.....
YUCK!
This picture has my last two tries, the first is the light blue-looking color above the door knob.....
NO WAY!!! :-P That color looks black in the container, and is called Licorice....WHY is it blue???
Anyway, I think I found it with the color over that electric-looking blue....it's called Lincoln Cottage Black (from Lowe's), and it looks the most like the cabinet on Pinterest, especially without the camera flash! :-)
Here's what my island looks like, struggling to find the right color.....
SHEESH!!! :-P I was getting ready to start mixing my own color, from all the samples I had! LOL
The biggest problem with getting the island painted a good color is that it's right in front of the kitchen window, which faces south.....so the sunlight is always illuminating the island! So colors that look perfect on the paint card or painted somewhere else in the house, look completely different on the island. I'm just happy that I've found it (maybe...). Tomorrow I'm going to paint more of the island with it, so I can be sure!
So that's what I've been up to today. I did walk into my messy craft room to try and make some kind of dent in that pile of STUFF, but it's way too chaotic in there! That's going to be a full-day job, that's for sure!!
I am still enjoying this gorgeous weather - all my windows are open, and the night air is so cool and refreshing! Welcome, Fall!! ^-^
When we built it, I wanted a different color in there, and I picked green.....
I've never been completely happy with this color....I color-matched it with a green from one of my Olde Century Paint color charts, but I still have never felt like it fit the piece, or the kitchen.
So when I saw this on Pinterest.....
I knew I wanted that color!! This is a piece by David Smith, I think, so I know I have the right taste! Haha!
Anyway, it's been all down hill from there! I have purchased THREE different shades of black (samples, at least), and used others I already had, and I haven't been close! :-P.......
YIKES!! No way!!
NOPE!!
Tried this color on the right corner.....
YUCK!
This picture has my last two tries, the first is the light blue-looking color above the door knob.....
NO WAY!!! :-P That color looks black in the container, and is called Licorice....WHY is it blue???
Anyway, I think I found it with the color over that electric-looking blue....it's called Lincoln Cottage Black (from Lowe's), and it looks the most like the cabinet on Pinterest, especially without the camera flash! :-)
Here's what my island looks like, struggling to find the right color.....
SHEESH!!! :-P I was getting ready to start mixing my own color, from all the samples I had! LOL
The biggest problem with getting the island painted a good color is that it's right in front of the kitchen window, which faces south.....so the sunlight is always illuminating the island! So colors that look perfect on the paint card or painted somewhere else in the house, look completely different on the island. I'm just happy that I've found it (maybe...). Tomorrow I'm going to paint more of the island with it, so I can be sure!
So that's what I've been up to today. I did walk into my messy craft room to try and make some kind of dent in that pile of STUFF, but it's way too chaotic in there! That's going to be a full-day job, that's for sure!!
I am still enjoying this gorgeous weather - all my windows are open, and the night air is so cool and refreshing! Welcome, Fall!! ^-^
Sunday, September 9, 2012
My Cabinet Is Almost Finished!!
Well, we only got the cabinet half-made.....I need another piece of wood, can you believe it??! :-P
I already bought two more this weekend, but I guess I measured wrong....I'm not too disappointed, because it's still really exciting to see it standing there in the kitchen! :-D
The boards were 6 feet long, but I wanted it to be no higher than 5 feet, so that's what Brian cut them to, and then we had enough to make the main BOX.....
There it is, right in the spot where I want it to go in the kitchen! See how the darker stained wood is on the inside....I definitely like the side that I stained with paint better for the outside of it. Now all it needs is shelves and the door! That will get done next weekend!! YAY!!! :-D
SO.....last night, the cold front that we've been waiting two weeks for finally came through, and it's been a gorgeous day! I've had the windows opened all day (and they are opened now, too), and I just love the smell and the sound of the outside.....it's bringing back memories of Fall, which I just LOVE!! *Sigh!*
Oh! And the Apple Festival is next weekend - I can't wait!!! I loved it last year, and I'm saving my pennies to be able to buy a bunch of apples this year, and the Asian pears! They also have wonderful craft booths, like wooden items and pottery, which are all handmade by local small business people - I want to be able to buy one or two things from them, too....oh, it's going to be SO much fun!! :-D
I think Fall has finally beaten Summer back, after so much heat and humidity....what a relief! I hope everyone is enjoying this delicious fresh air like we are!! ^-^
I already bought two more this weekend, but I guess I measured wrong....I'm not too disappointed, because it's still really exciting to see it standing there in the kitchen! :-D
The boards were 6 feet long, but I wanted it to be no higher than 5 feet, so that's what Brian cut them to, and then we had enough to make the main BOX.....
There it is, right in the spot where I want it to go in the kitchen! See how the darker stained wood is on the inside....I definitely like the side that I stained with paint better for the outside of it. Now all it needs is shelves and the door! That will get done next weekend!! YAY!!! :-D
SO.....last night, the cold front that we've been waiting two weeks for finally came through, and it's been a gorgeous day! I've had the windows opened all day (and they are opened now, too), and I just love the smell and the sound of the outside.....it's bringing back memories of Fall, which I just LOVE!! *Sigh!*
Oh! And the Apple Festival is next weekend - I can't wait!!! I loved it last year, and I'm saving my pennies to be able to buy a bunch of apples this year, and the Asian pears! They also have wonderful craft booths, like wooden items and pottery, which are all handmade by local small business people - I want to be able to buy one or two things from them, too....oh, it's going to be SO much fun!! :-D
I think Fall has finally beaten Summer back, after so much heat and humidity....what a relief! I hope everyone is enjoying this delicious fresh air like we are!! ^-^
Subscribe to:
Posts (Atom)