Start with your candy canes -- I got mine at the Dollar Store, but they are everywhere now.....
Also, I have my glue gun ready and the twine.
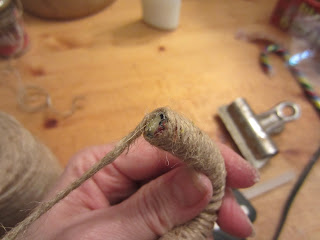
I used the glue gun just for the tip this time, because it sets fast, so it's perfect for winding over and around the tip, and covering it.....
I just dab the hot glue on the tip and press the twine into it, and then dab more hot glue on either side of the twine, and press the strip of twine into it in a circle, so the whole tip is covered.
Then I dab the hot glue around the sides at the bottom.....
.....and wrap the twine around, pressing it into the glue quickly before it cools!
From this point on, I used plain white glue going up the cane, so I didn't have to keep dabbing the hot glue at every wrap around of the twine - THAT would be tedious!
The white glue worked just fine.....
Can you follow along with my pictures? I don't think I need to write out my steps, but if anyone has questions about it, just ask! :-)
See in the bottom picture how the trouble with the curve starts....? There's NO easy way to fix this, for me anyway! I just wrapped it evenly with spaces.....
.....and went back to it after the rest was done.
I used the white glue up to the tip again.....
.....then I used the glue gun and pushed the twine into the hot glue and snipped off the end!
It came out perfectly! Now to fix that curve......
I used the hot glue to attach another piece of twine underneath.....
Then I put a little more white glue in the spaces.....And I carefully wrapped the twine into each space - just once around, so it wouldn't be too thick......
.....and then I used the hot glue again to secure the other end underneath the curve. You can hardly tell, right?! Then it's DONE......
I repeated it all again for the other candy cane. I just want to NOTE that you need to be careful while wrapping the twine around, because I broke the second candy cane again, just as I was getting up to the curve -- I was pulling the twine around SO tightly that my fingers holding the candy cane were putting too much pressure on it! You want the twine tight, but make sure you aren't squeezing too hard with your other hand!
With both candy canes covered, I used the glue gun to secure them together.....
I like this position much better than the first set I made.....
I have my strip of fabric for the bow ready! It should have been a little longer (because it was tricky to tie!), but this was a scrap I had left and I wanted to use it up.
It worked fine.....
I considered putting buttons on there, but I just love the rusty jingle bells too much! :-D
I sewed them into the bow, and tied them in back.....
PERFECT!!!
Look how neat those rusty bells look.....
I love them!!! :-D
I used the thread to make a little hanging tie.....
And they were DONE.....
Now what do I do with them????......
Hahaha! I'm just kidding!! I'm going to make the other four, and then maybe put them on a wreath or a garland, or they can even go on the Christmas tree when we get it! I just LOVE how they look, even hanging right there on my cabinet! :-D
Well, this is a long post! I have so much more I want to post about....I'm working on a penny rug for my mom.....
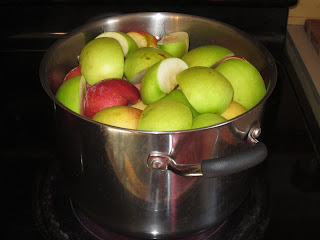
I started my applesauce.....
OH!!! And something really fun that I'm going to make tomorrow with the gingerbread dough......
Isn't that WONDERFUL?!!!! I love it! :-D I'll tell you more about it tomorrow, but I will say that I worked on enlarging the pattern for about an hour before dinner today! I can't wait to see how it comes out!!!!
There's so much more I want to share (after over a week of being away!), but I'll have to save it for tomorrow. I hope my explanation of the twine candy canes will help anyone who wants to try them! Just let me know if I need to explain something better or if any help is needed, I'll do my best to fix it!! ^-^


Lisa, Your Twine Canes turned out wonderful, and you make it look so easy. Thanks for sharing the Tut with us all. I do like the rusty bells way more than the buttons.
ReplyDeleteThe Penny Rug is going to turn out Great...love the colors and look so far; look forward to reading more on the making of it.
Really??? Theresa, you are going to make this Ginger Sleigh? Oh MY!!! What a treat to have this around during the Holidays, hand made by You. :D YAY!!! :D
Thanks Marlene! I KNEW you would like them!! ;-)
DeleteI'm waiting for a red to put in the center of the penny rug, won't that look great next to the mustard color? Now comes the tedious sewing part!
I can't wait to show you the sleigh when it's finished -- I'm sealing the pieces right now, THEN I'll glue them together....I hope it all works out right...!! :-D
These turned out so cute.
ReplyDeleteThanks for sharing the how to's, I will have to give them a try.
I agree love the colors in the penny rug. It is going to look wonderful.
Tam
Thanks, Tammy! I never knew how much I liked twine on stuff!! LOL
DeleteLisa, you are so creative!! I think this is even easy enough for me to try :) Thanks so much for sharing!
ReplyDeletehugs, Trish
Love these! Where did you find your rusty bells?
ReplyDeleteHi Della!! I got my rusty bells from ebay! :-D I'm sure you could find them on etsy too.
DeleteThere are TONS of sellers on there with all sizes -- these are small, and I JUST bought some 1inch bells to make something else. The best part is they aren't expensive either!
Oh, thank you so very much! The candy canes are just so cute!
Delete